Data Stories
Data stories are a self-standing unit of interaction between you and an API.
What is a data story?
Traditionally, APIs are considered as doors to information that only developers or skilled tech practitioners can open either by writing code that integrates with an API or by using dev-oriented tools for interacting with it.
The API Spots project focuses heavily on the not-so technical audience and its core philosophy is that since today APIs are the driving force of the web all users should be able to discover, understand and interact with them in order for their value to be broadcasted and leveraged even more.
There are numerous tools out there for interacting with APIs which are primarily focused on developers and technical audiences. The challenge here is to explore alternative more human-friendly ways of interacting with an API.
This is the fundamental concept behind the term data story. It is an abstraction layer between a human and a service that can be easily comprehended, shared and evolved.
A data story can be thought as a self-standing unit of interaction between a user and an API operation. It consists of an API operation, and input and an output in its simplest form.
Creating data stories
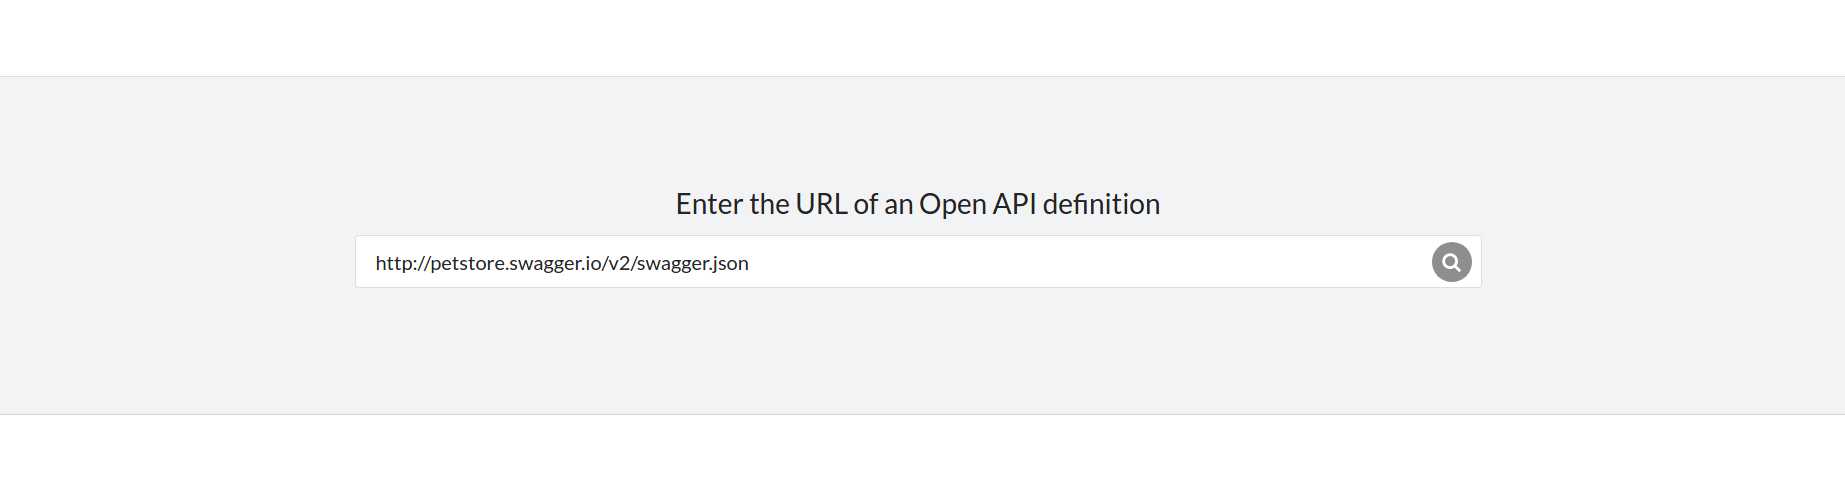
Let’s create a first story for the infamous Petstore API. You can either enter the APIs Open API URL in the address bar on the Open APIs explorer hope page (the one displayed after) clicking on the extension button.
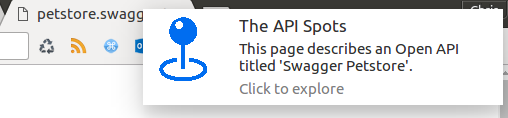
Or you can just visit the Petstore API spec and clicking on the notification.
You can start creating data stories through the Open APIs explorer section called ‘Data Stories’.

Clicking on the card will bring up a modal for creating your first story.
The modal is divided into a series of steps that will guide you through the creation of a story.
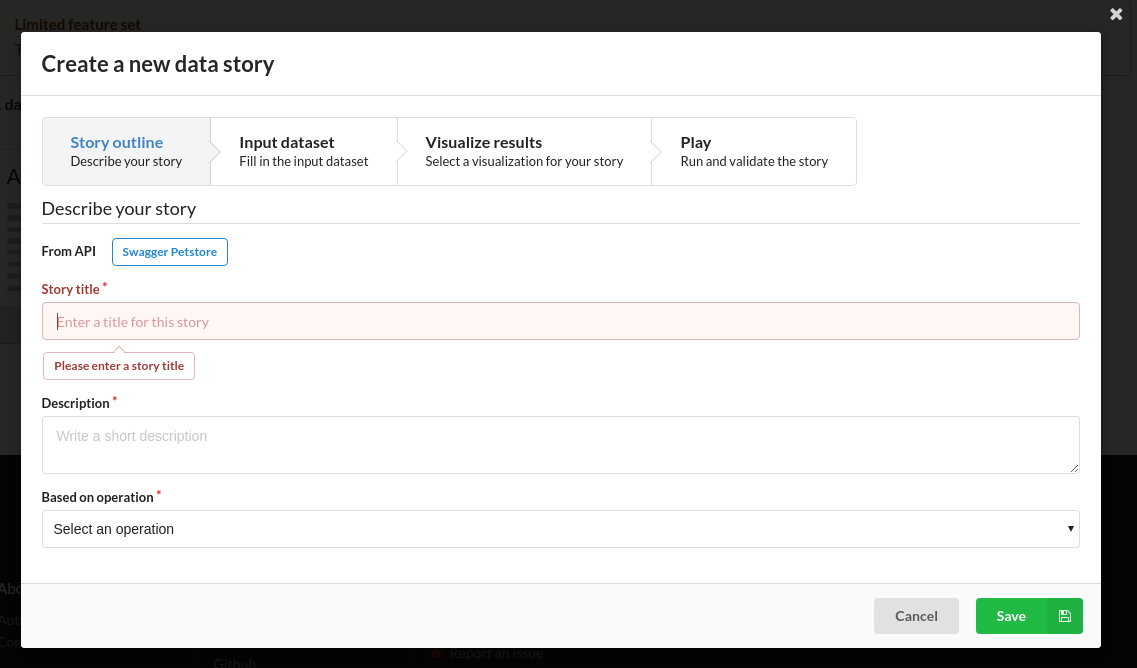
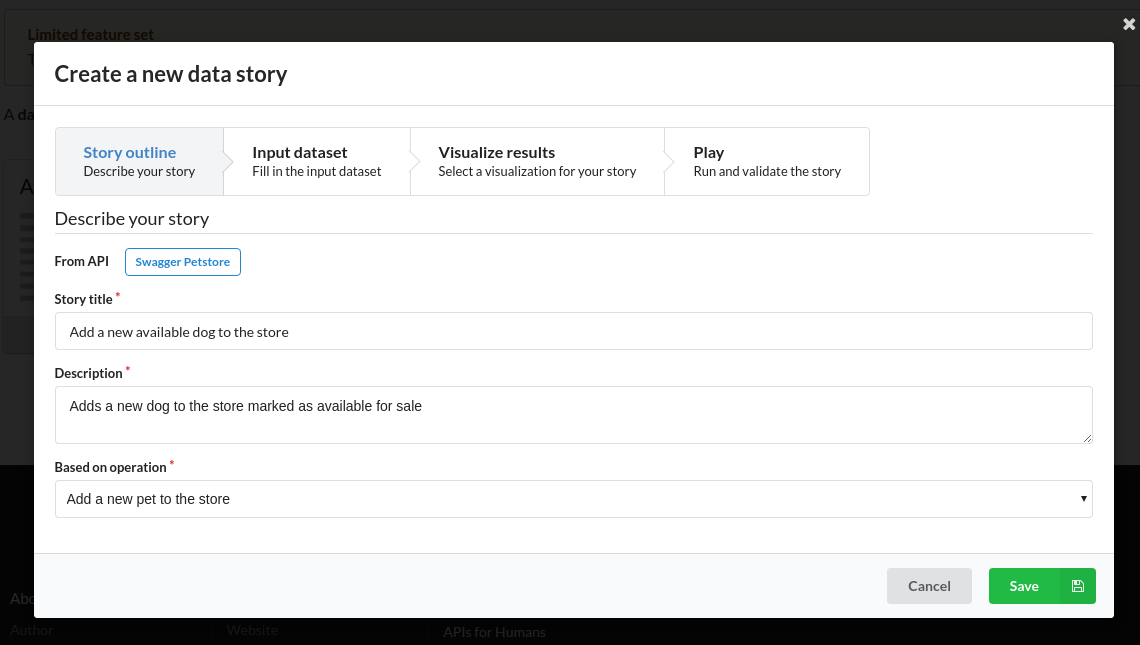
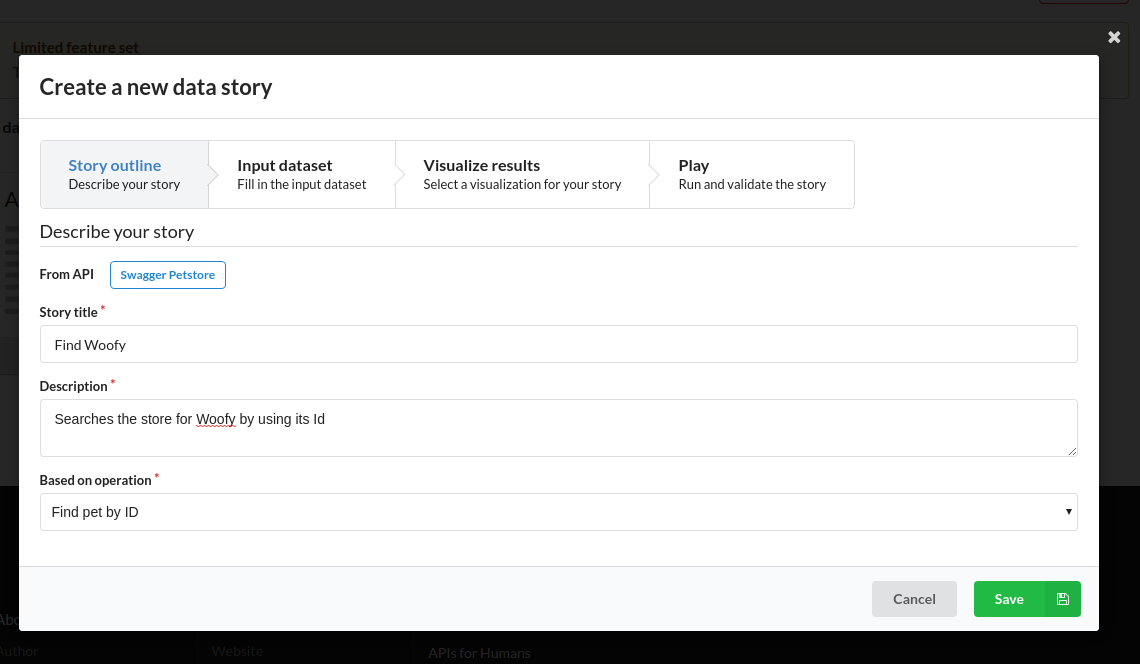
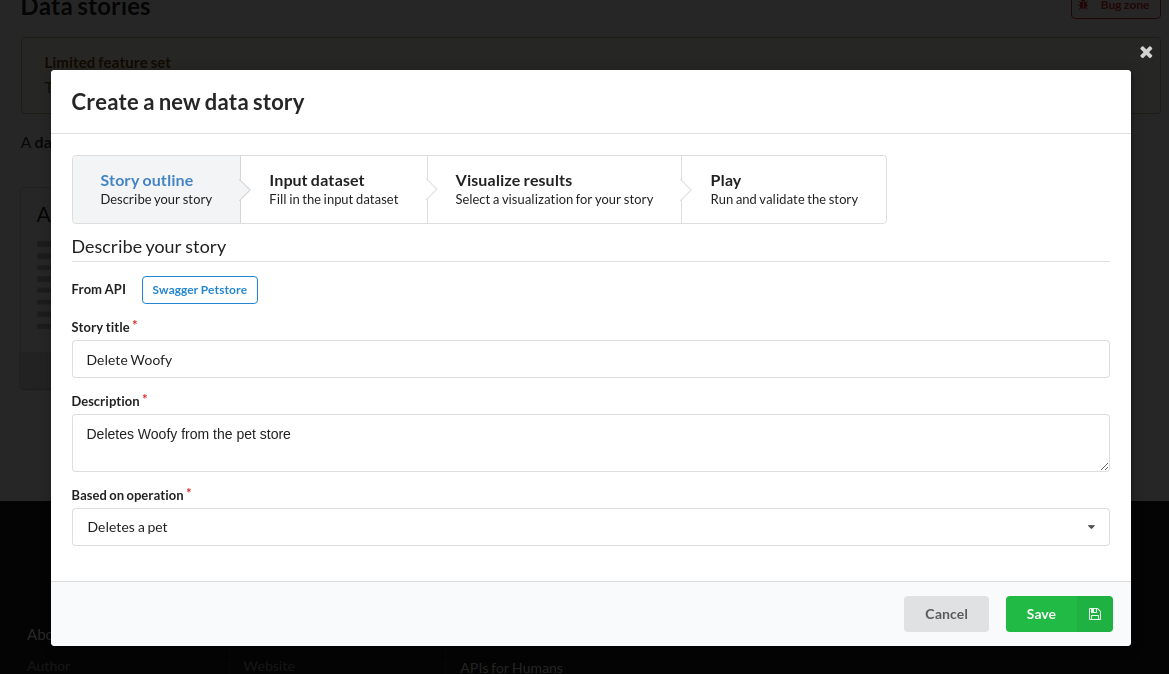
Story outline
The first required step that needs to be filled with information is the Story outline.
Here you will enter a title and description for your story and select an API operation
that will form the basis of your story.
Giving your stories a comprehensive title and description is the first and most important step in order to create meaningful stories that can be easily understood and later shared or referenced.
The list of operations in the dropdown is taken directly from the Open API definition of the API. So let’s start by creating a story that will add a new pet to the store.
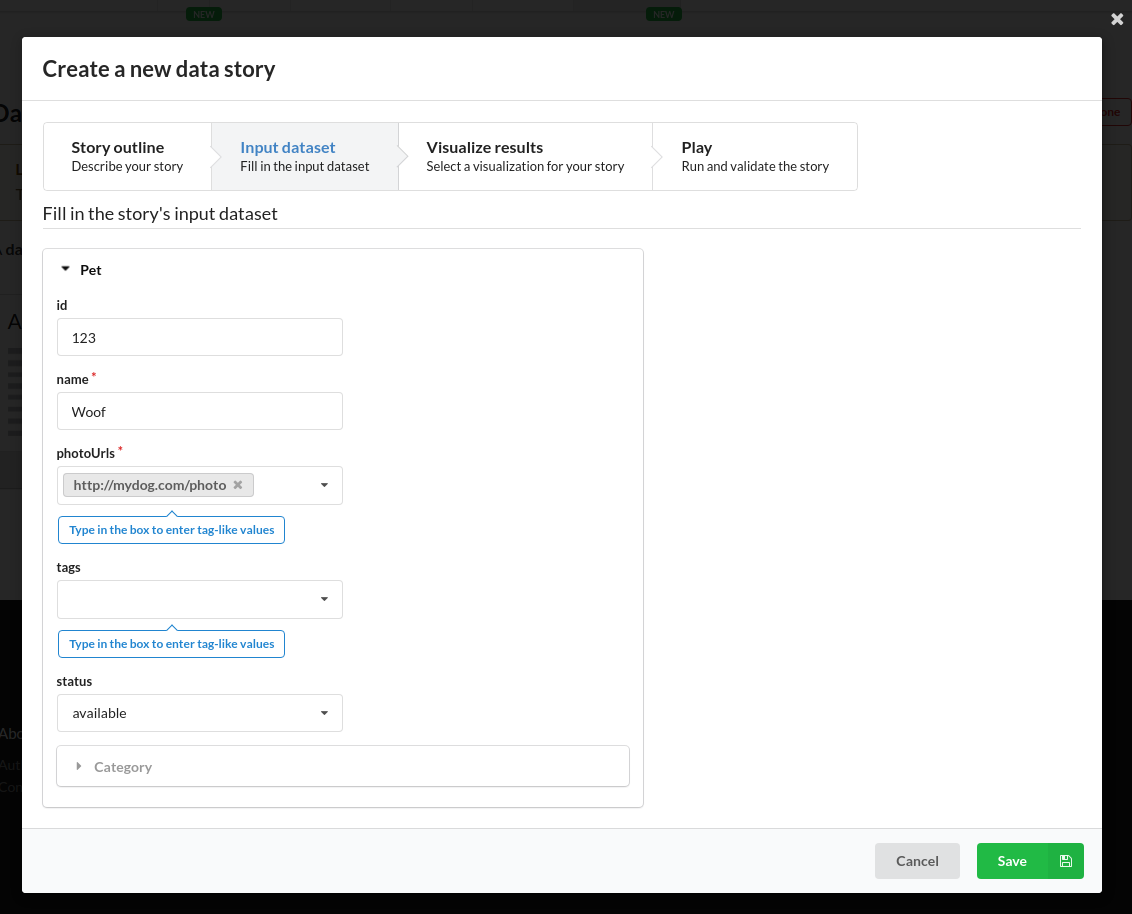
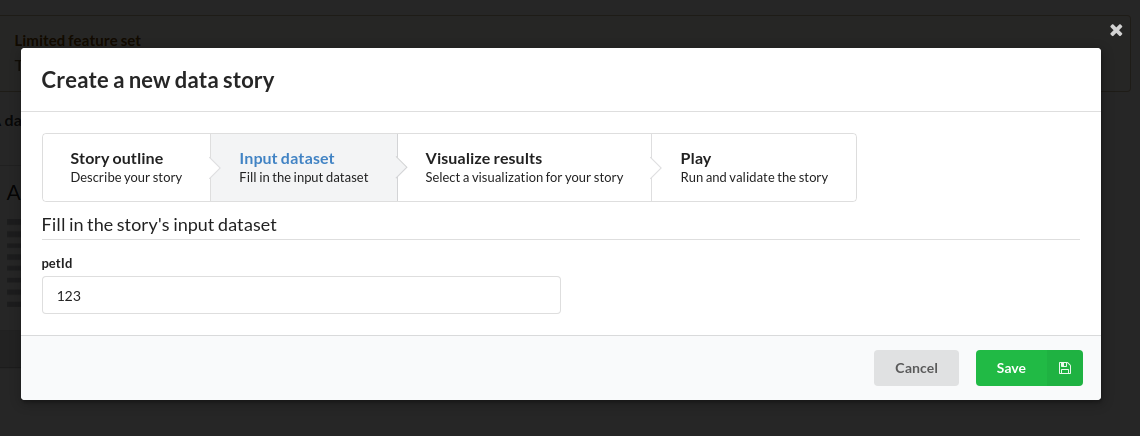
Input dataset
After we have defined the basic information of our story, the next step will help us create an input dataset for this operation to be executed.
Click on the step called ‘Input dataset’.
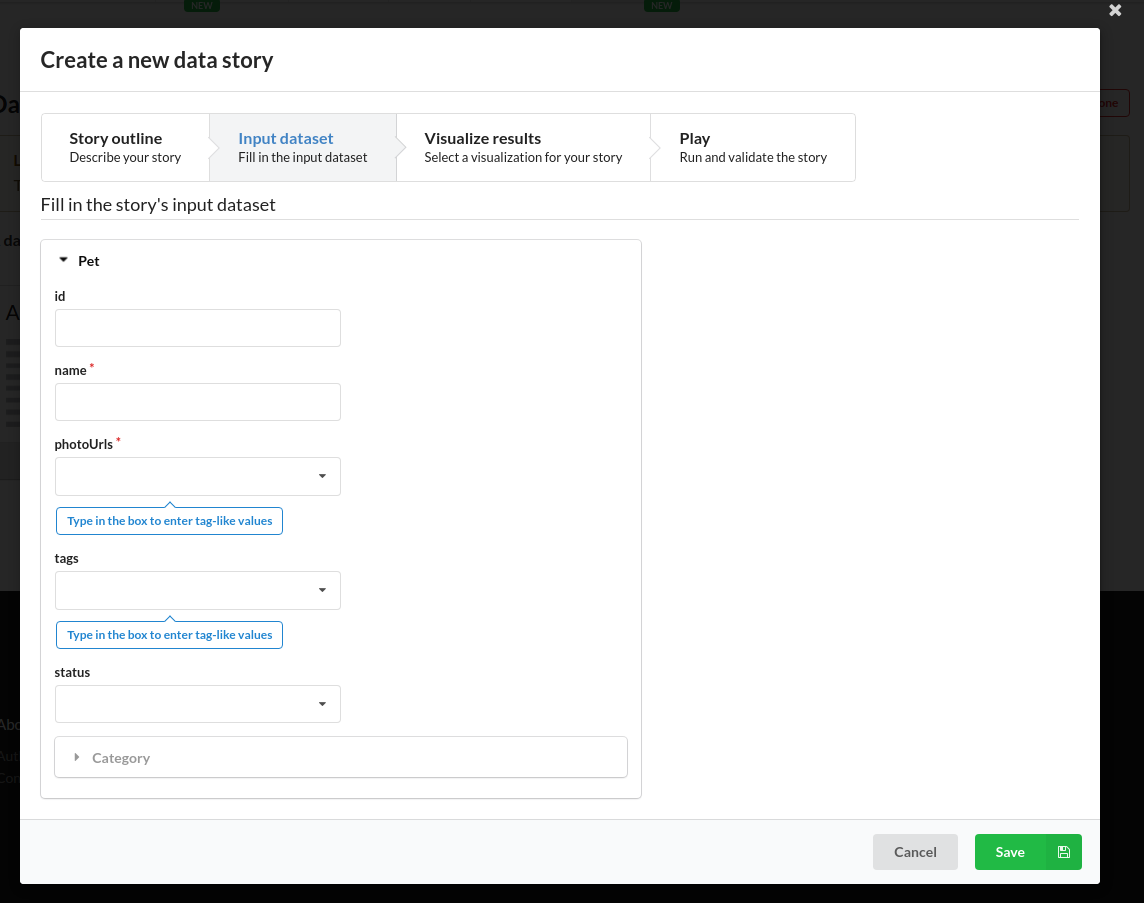
What you see in this step is a high-level representation of the operation’s input data definition encapsulating all the technical jargon and complexities and instead letting the user define the input dataset through a set of automatically generated and familiar forms that reflect the structure of the associated data definition as defined in the Open API spec.
In this example, this API operation requires as an input a data set described by the Pet data definition - or in other words a dataset describing a pet instance.
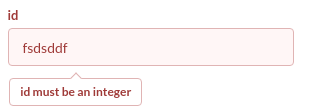
All fields map to data model properties and those required are marked with . Again, depending on the completeness of the Open API definition, properties can be marked as required and have specific rules regarding type, format, etc. These are reflected through validators that work as you fill-in the input data.
At a minimum you have to fill-in all required properties before we can move on to the next step.
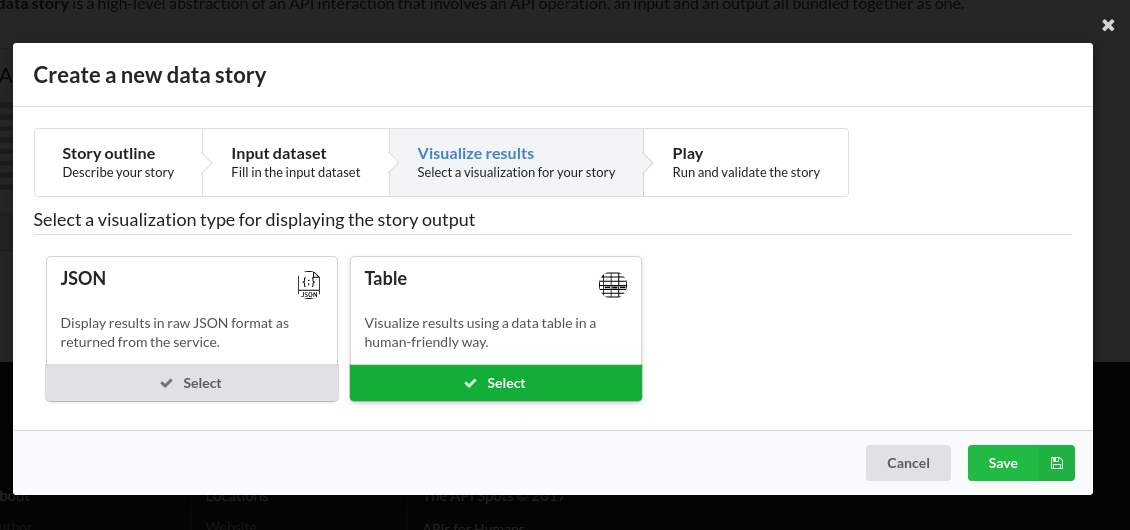
Visualizing results
Moving on to the next step, click ‘Visualize results’.
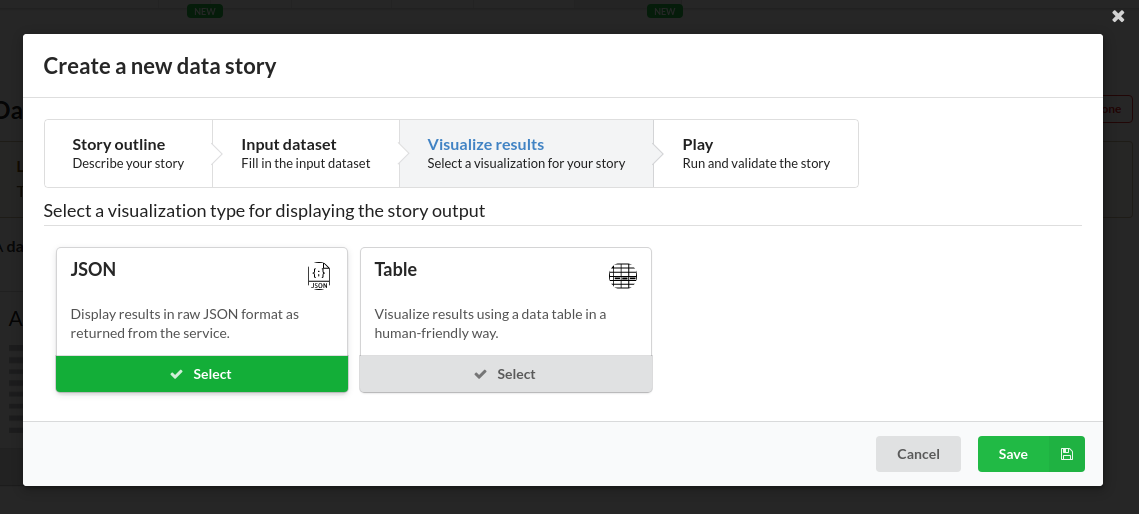
In this step you can choose an output visualizer to associate with the story so that the operation’s results can be comprehended in the most convenient way.
After selecting the visualization of choice let’s move on to the final step.
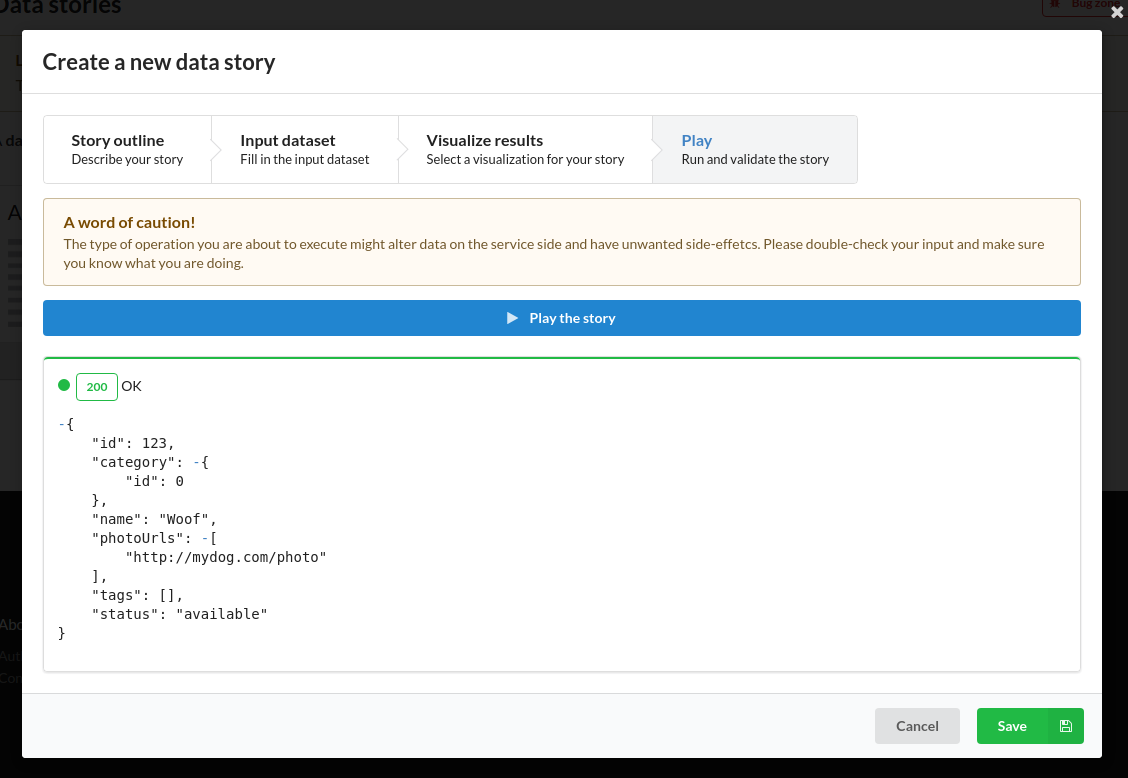
Playing the story
The final step is optional but can be useful if you need to have a go on the story to verify that everything is as expected.
This step is useful mostly for read-only operations.
Clicking on the Play button the operation will be executed against the API and the service response will be displayed in the visualization we had selected in the previous step.
Saving the story
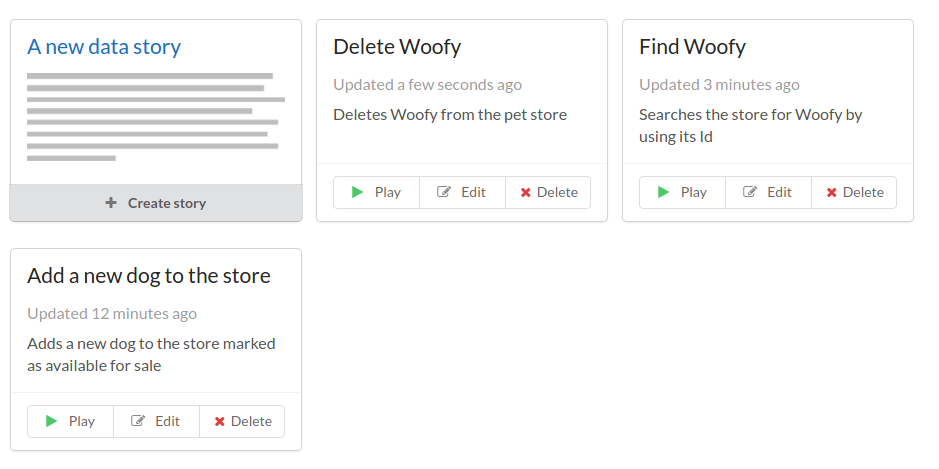
Now that we are all set and verified that the story works as expected, we can go on and save the story by clicking on the Save button. Once the story is saved it will be available in the Data Stories section as a card.
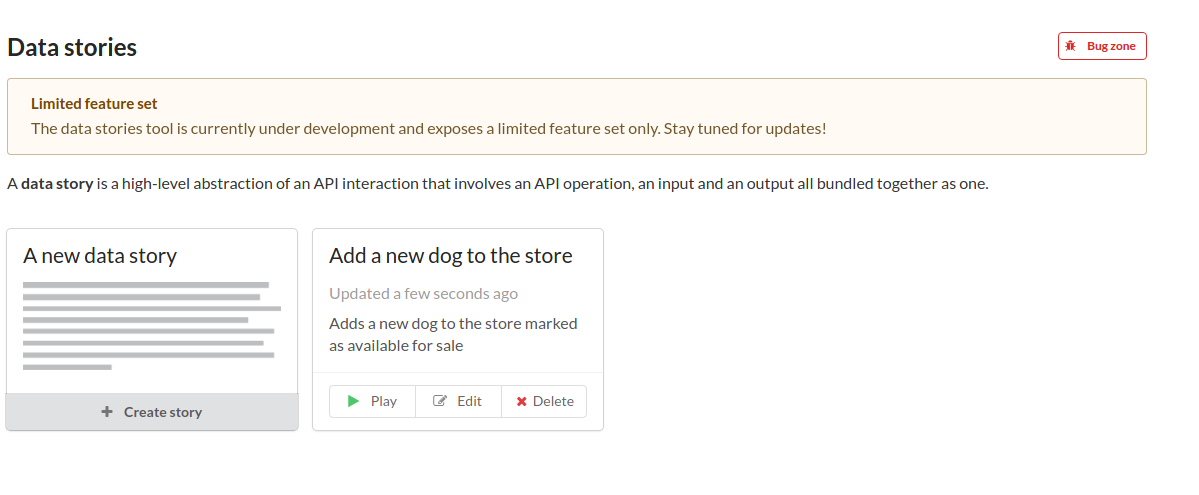
You can now play, edit and delete the story directly from its card.
Let’s create a few more
Now that you have grasped the basic idea let’s create a couple of more stories that will complete this first walk through.
Create a story for finding the new pet
After we have created our first pet in the store, let’s create a story for finding Woofy.

Create a story for deleting the pet
Similarly we will create a last story for deleting Woofy from the store.
Wrapping up
Now that we have created our stories you can play them directly from their cards or editing them in order to alter operations, inputs and visualizations.
As described in this section, data stories are abstractions that hide all technical bits-n-pieces from the user, allowing to focus only to what’s important.